In this blog post, I will show you how to integrate Azure SQL Databases or Synapse SQL Pools with Azure DevOps.
I frequently come across databases that don’t have any code version control. I believe it’s old news that it’s too difficult to enable code version control. Or maybe people aren’t aware of the available toolsets.
With Azure DevOps, you get up to 5 free licenses to get started.
This tutorial will help you enable code version control for SQL Server databases, Azure SQL Database, Azure SQL Managed Instance, Azure Synapse SQL Pools, etc.
Table of Contents
Create Database Project in Visual Studio
First, create a new database project. You can integrate Azure SQL Databases or Synapse SQL Pools with Azure DevOps, in Visual Studio (or your tool of choice like Visual Studio Code).

If you’re missing this option, you can enable it in the Visual Studio installation.

Next, define a name for your project and click create.

Then, you’ll see your new Visual Studio solution and the database project available. You are ready to start creating objects.
It’s possible to have multiple database projects in the same Visual Studio solution (.sln).

If you, like many other users, are trying to enable code version control for an existing Azure SQL Database or Synapse SQL Pool, click import database.

Configure the following options to connect to an existing Azure SQL Database or Synapse SQL Pool.

The Azure DevOps solution will start importing different objects within your Visual Studio solution for Azure SQL Database or Synapse SQL Pool.


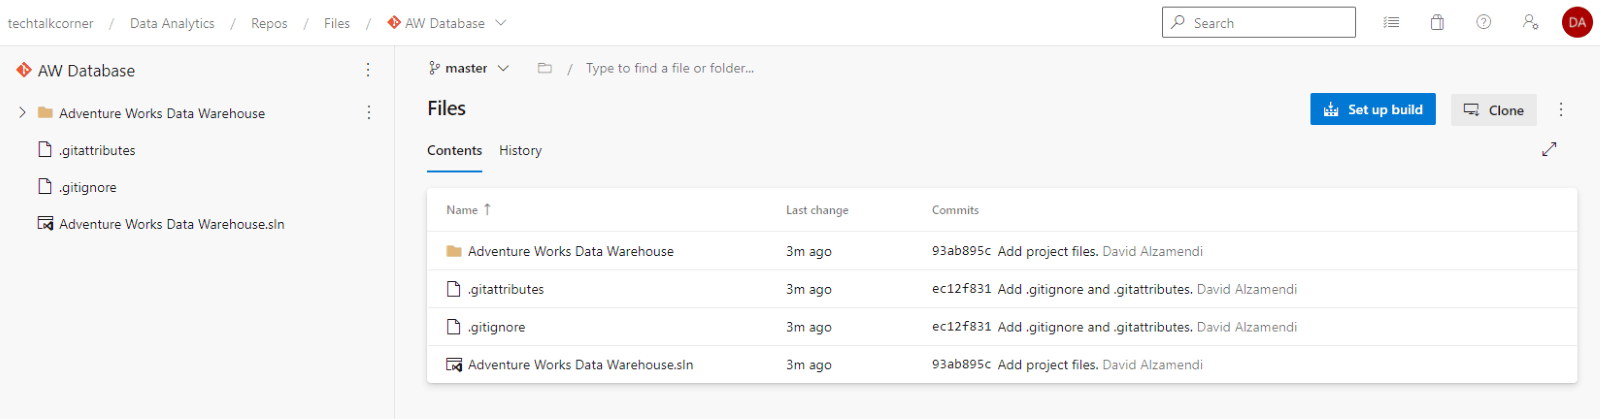
Finally, once you finish importing your Azure SQL Database or Synapse SQL Pool into your Visual Studio database project, you will see all the objects available in the solution explorer.

You are ready to check your project into Azure DevOps.
Create Azure DevOps Repository
To begin, create an Azure DevOps repository to integrate Azure SQL Database or Synapse SQL Pool.

Disable the initialization of the repository and click Create.

Copy the URL.

Integrate Azure SQL Database or Synapse SQL Pool with Azure DevOps
In your Visual Studio solution, click “Add to Source Control” to integrate Azure SQL Database or Synapse SQL Pool with Azure DevOps.

In the following window, you need to paste the Azure DevOps URL for your repository. Some Visual Studio versions will have Azure DevOps fully integrated at this stage.

Paste the URL and Create and Push. This will automatically push all your local git changes to the Azure DevOps repository.

You’ve finished the integration of Azure SQL Databases or Synapse SQL Pools and Azure DevOps.
Test Integration of Azure SQL Databases or Synapse SQL Pools with Azure DevOps
You can modify the description of a table to test the integration of Azure DevOps and Azure SQL Databases or Synapse SQL Pools.
Remember, when you commit changes, this happens locally in your workstation.

Make sure you push the changes to the Azure DevOps repository.

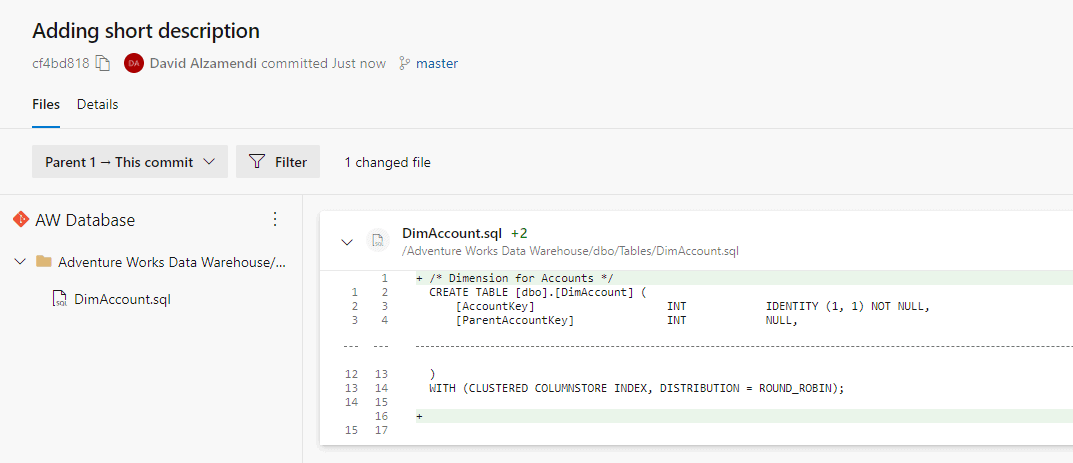
In Azure DevOps, new changes show up as part of the integration of your Azure DevOps and Azure SQL Databases or Azure Synapse SQL Pools solution.

You can even see how it has changed!
If you are looking at manually deploying your changes to the target database, click Publish.
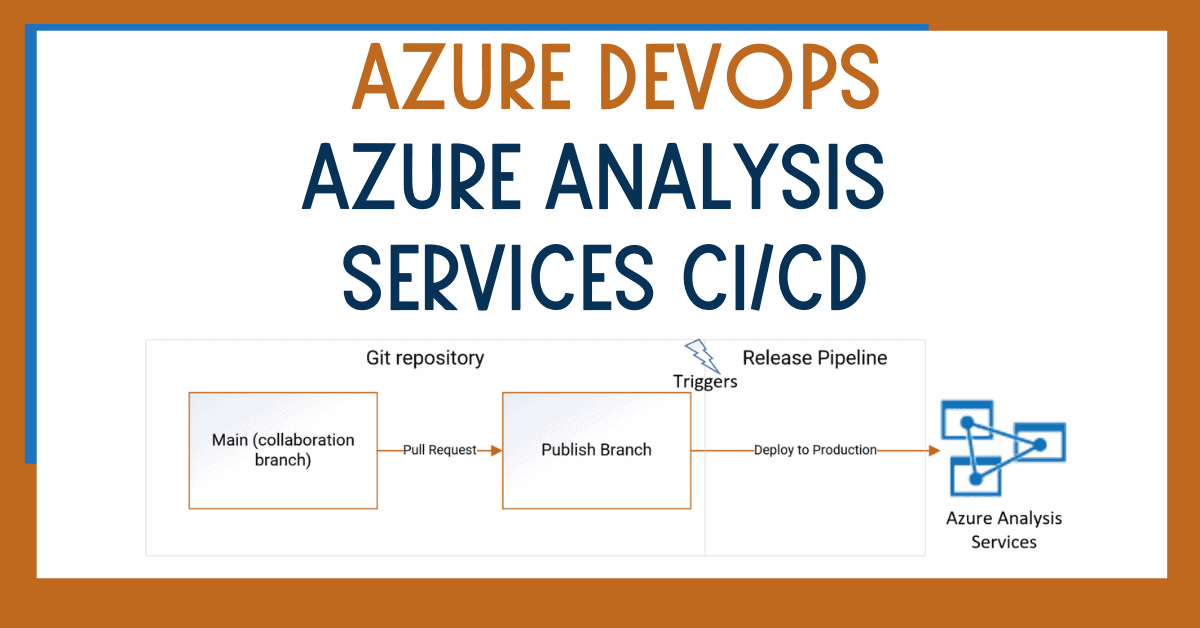
You’ll learn how to easily enable Continuous Integration and Continuous for this solution in upcoming posts.

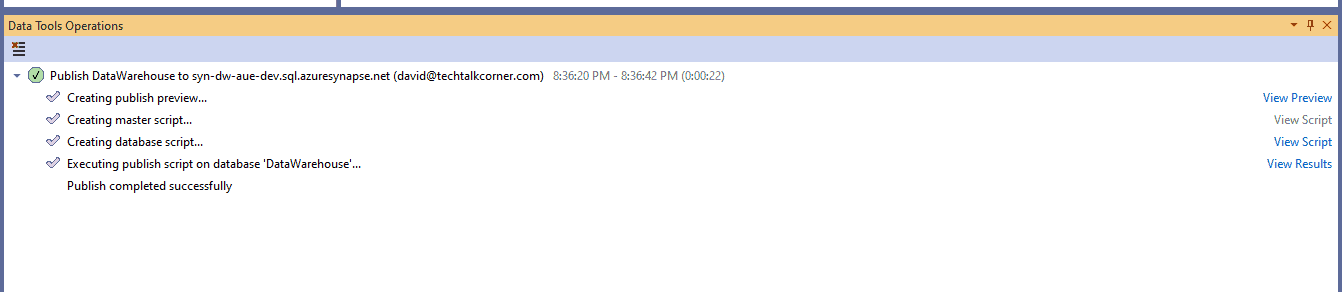
Configure the target connection string for your Azure SQL Database or Synapse SQL Pool and click Publish.

Once the process finishes, the changes will be available in your target database.
Summary
In this blog post, you learned how to use Azure SQL Databases, Synapse SQL Pools, SQL Server databases and Azure DevOps together.
Today, I have demystified the myth that using code version control is difficult, expensive or time-consuming.
Azure DevOps offers some licenses that you can use for free, so there’s no excuse not to start using it. It’s possible to use any code version control provider, but Azure DevOps gives you release pipelines, Kanban boards, and an amazing ecosystem that integrates with Azure, not just version control.
What’s Next?
In upcoming blog posts, you’ll learn how to easily enable Continuous Integration and Continuous for this solution.
Please follow Tech Talk Corner on Twitter for blog updates, virtual presentations, and more!
As always, please leave any comments or questions below.