Whether you are starting to use Azure DevOps or you have been using it for a while, integrating DevOps with Azure Key Vault is a fundamental skill to have. Today I’ll show you a couple of ways to integrate Azure DevOps and Azure Key Vault.
This blog post will explain how to use Azure Key Vault secrets in Azure DevOps. For the examples, I’ll use release pipelines. You can follow similar steps for using build pipelines.
Table of Contents
Why two methods?
- If you are planning to use Azure Key Vault only for a specific Job within DevOps and this information is not valuable to be shared across multiple pipelines, use the built-in Azure Key Vault task to get secrets.
- If you are planning on using Azure Key Vault secrets across multiple pipelines and jobs, I recommend having a look at the Variable Groups described in the last tutorial.
Why should I use Azure Key Vault in Azure DevOps?
To begin, Azure Key Vault allows you to securely store and maintain credentials. You don’t want to hardcode any sensitive information in your pipelines in Azure DevOps.
I highly suggest checking it out, especially when working with Azure Data Services and doing CI/CD.
Create Azure DevOps Service connection for Azure
First, you need to grant Azure DevOps access to your Azure subscription. The following method allows you to do this without writing a single line of code.
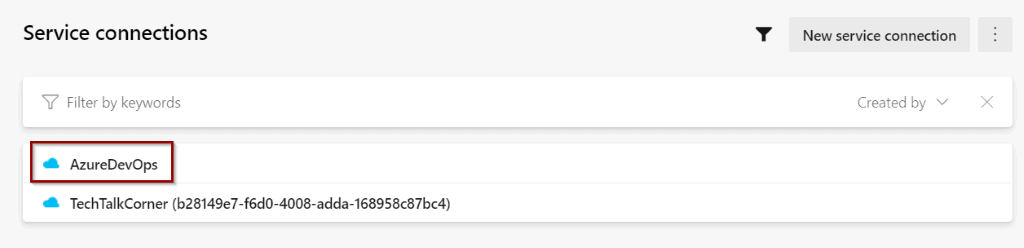
In Azure DevOps, navigate to Service Connections and create a new one.

Select “Azure Resource Manager.”

Now, select Service Principal as the authentication method between Azure DevOps and Azure. This option creates a service principal for you.

Next, fill out the configuration of the connection as shown below. If you are concerned about security, you can define a most granular level (by selecting a specific resource group).

Your new connection is ready and Azure DevOps has direct access to managing your Azure subscription.
Give Azure DevOps access to Azure Key Vault
Second, click on service connection and then Manage Service Principal.

This takes you to the Azure Portal. Copy the Application (Client) ID. You will come back to Azure DevOps for the final integration, so stay in the Azure portal.

In your Azure Key Vault, select Access Policies and Add Access Policy.

To work with secrets, “Get” and “List” are the correct permissions. If you are going to work with Keys or Certificates, you need to customize them based on your needs.

Click to add a Service Principal and paste the Application (Client) ID that you previously copied. Find the service principal and click Select.

Click Add.

Finally, click Save. Your Azure DevOps has access to work with information created in Azure Key Vault.

For the next tutorials, you are going to be working with a few demo secrets.

Azure DevOps and Key Vault with built-in task
Back in Azure DevOps, it’s time to start using Azure Key Vault. For this example, I’ll use a release pipeline, but you can follow the same steps for a build pipeline and YAML.

Click Empty Job.

Then, click jobs and tasks.

At the Agent Job level, click to add a new task.

There is a pre-built Azure Key Vault task that you can use.
This task will get information from Azure Key Vault (in this case, secrets) so you can use them in the following steps.
Note:
The secrets extracted from Azure Key Vault will become variables in our pipeline. For example: rgName can be referenced as a variable by using $(rgName).

Configure Azure Key Vault task:
- Previously created service connection
- Key Vault name
- Secrets can be filtered by name (* will list and get all the secrets)

For testing purposes, add a new task and search for PowerShell.

Change the configuration to Inline and add the following code before clicking Save.
Write-Host "Resource Group name variable $(rgName)"

Write-Host "Connection String variable $(azSqlConnectionString)" 
If you have created a Release Pipeline, click Create to trigger it.

Let’s check the progress. Click the Release link.

Scroll over your stage and click Logs.

You can see that one of the steps is accessing Azure Key Vault, listing and getting the secrets.

Click that step to see more information.

You can also click the test PowerShell script to see the code.

By design (and this is a good thing), the values of the secrets are hidden with *. The variables are now available so you can use them in any steps.

Azure DevOps and Key Vault with a group of variables
As you saw before, if you have to create multiple pipelines and stages, this means that you need to include the Azure Key Vault task multiple times. To avoid this, Azure allows you to create a Variable Group and connect it to Azure Key Vault.
First, click to add a new Variable Group in the library.

Then, enable the option to connect Azure Key Vault and select your service connection and Azure Key Vault. Click Add variables.

This option allows you to select variables (secrets) that will be relevant to your environment.

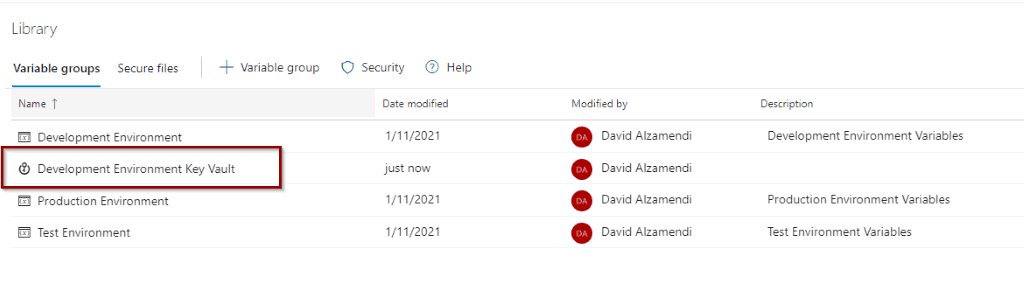
Save the Variable Group.

Now, you will see that the variable group becomes available and it has a different icon.
Create Release Pipeline
Let’s finish the integration and try to use that Variable Group. Create a New Release pipeline.

Click Empty Job.

Click Variables.

In Variables groups, you can Link an existing variable group.

Select the Variable Group. It’s possible to use different groups for different stages (context). For this demo, you will select Release as the context.

You can see the variables available so they can be used in your pipeline.

Click Jobs and Tasks to create a task to test them.

Add a PowerShell task to the Agent Job.

Include the following code inline to your PowerShell task and click Save.
Write-Host "Resource Group name variable $(rgName)"

Write-Host "Connection String variable $(azSqlConnectionString)" 
Create a release so you can test it.

Just like the previous tutorial, click the release link.

Select logs.

You will see an additional step to get Secrets from Azure Key Vault.

Click the step to see more information.

Click the PowerShell step to see the output.
As discussed previously, by design, you cannot see the values of the variables, but you can use them in any steps.

Summary
In this blog post, you learned two different ways to take advantage of Azure Key Vault in Azure DevOps. Both methods require 0 coding skills and they work at different context levels.
What’s Next?
In upcoming blog posts, we’ll continue to explore some of the features within Azure Services.
Please follow Tech Talk Corner on Twitter for blog updates, virtual presentations, and more!
As always, please leave any comments or questions below.