Table of Contents
Introduction
Azure Data Factory Locks allow you to extend your Role-Based Access Control (RBAC) security and define some policies to prevent people from deleting resources.
Have you been working on a project when somebody accidentally deleted a solution? Me too.
With a little bit of experience, you soon realize how important it is to establish strong security and RBAC policies.
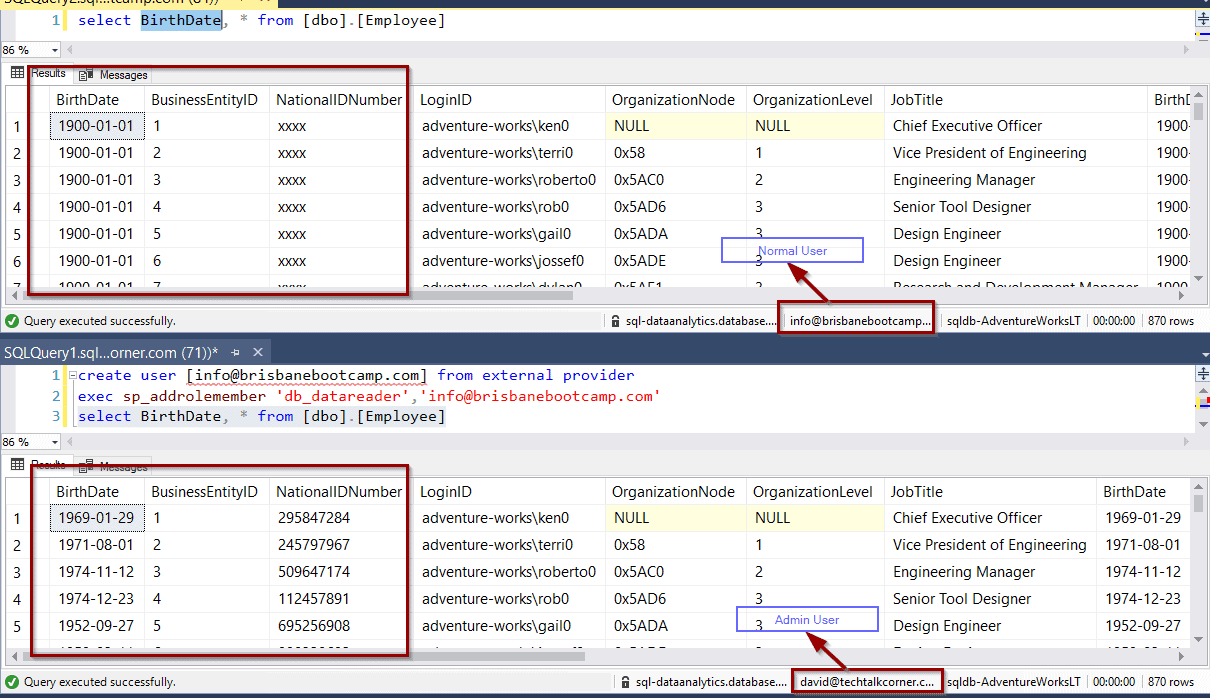
In Azure Data Factory, you can create your own custom role to allow users to explore solutions without the ability to edit. But what if an admin or developer deletes a solution accidentally in Production? While rolling back the changes by using code version control is an easy fix, prevention is the best method.
In this article, you’ll look at Locks that allow you to easily define some restrictions within your Azure Data Factory.
Access required to apply Azure Locks
To begin, to apply Azure Locks, you need to meet one of the following requirements:
- Be a member of the Owner or User Access Administrator roles
- Have access to Microsoft.Authorization/* or Microsoft.Authorization/locks/* actions
Azure Data Factory Locks
You can find Locks within your Azure Data Factory.

Locks are not only enabled for Azure Data Factory. They are a feature available as part of all Azure services so you can create policies that prevent changes to resources.
In the following screenshot, you can see that you have the options to configure resource group and subscription lock policies.

Resource Group locks

Subscription locks

Configure Azure Data Factory Locks
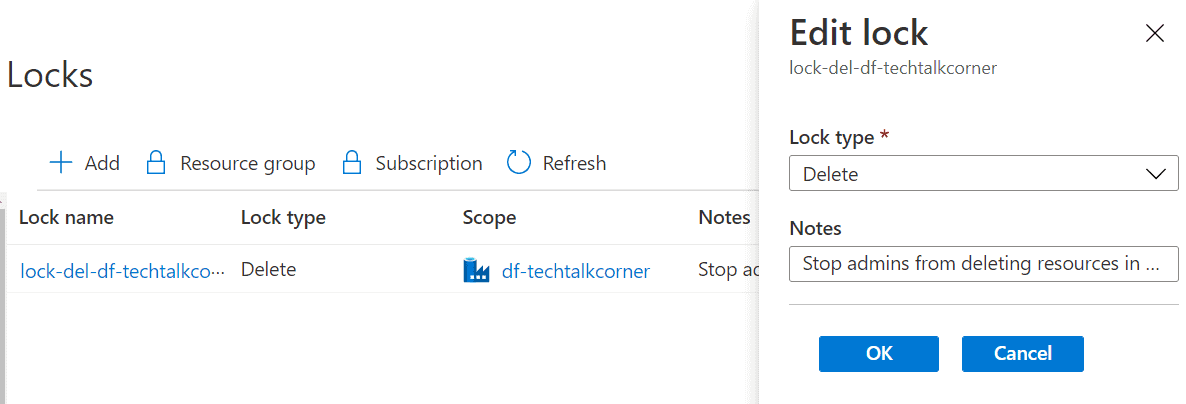
Next, define Read-Only or Delete locks.

Let’s create a Delete lock.

After you save the lock, it becomes available immediately on the list.

Test Azure Data Factory Locks
Now, it’s time to test it. It this example, I am using my admin account.

Try to delete a pipeline.

Remember: make sure you are using code version control in case you missed something during the configuration and you have to rollback the changes.

Then, publish the changes.

A list of the pending changes appears before you can click publish.

Finally, you can see that you are not able to publish the changes.

Summary
In this post, you’ve learned how easy it is to configure Azure Locks. It’s a no-code experience that allows you to secure your resources.
Final Thoughts
This feature certainly complements other security features and must be taken into account for Production environments.
Other security features:
- Role-based access control groups
- Custom roles
What’s Next?
In upcoming blog posts, we’ll continue to explore some of the features within Azure Services.
Please follow Tech Talk Corner on Twitter for blog updates, virtual presentations, and more!
As always, please leave any comments or questions below.