Do you want to audit or protect sensitive data in Azure databases? Today, we’ll look at one of the advanced data security options in Azure for databases. It’s available in Azure SQL Database, Managed Instance and Synapse Analytics. You can configure these database features in Azure by coding with T-SQL or using the Azure Portal. Today, we will look at enabling data classification.
Data classification is available in the three main managed databases:
Azure SQL Database, Azure SQL Managed Instance, and Azure Synapse Analytics
Table of Contents
Why use data classification?
To begin, there are many reasons why you should use this feature, for example:
- Secure and audit sensitive data
- Enable seamless reporting of who is accessing your data, which data assets and when
- Allow your company to meet compliant restrictions
- Configure easily
In my next blog post, we’ll look at consuming the audit logs for this feature.
Enable and Configure Data Classification
First, to enable data classification, you’ll need to go to the “Advanced Data Security” section of your database and click on the “Data Discovery & Classification” option.

Within this section, you will be able to:
- Configure and modify policies
- Apply classifications
Configure
Next, if you click the configure option, you can:
- Create your own labels
- Manage information types
- Import/Export existing protection policies

Create your own label
By default, Azure offers some standards, like Public, General, Confidential, or GDPR. Additionally, you can create your own labels.


Manage Information Types
Modifying existing information types or creating new ones is simple. It works using the column names. Also, Azure can give you suggestions when you use multiple wildcards for the column names.
This opens a lot of different options to work with different languages or naming conventions that you have defined within your company.

Import/Export
At this stage, it isn’t possible to define the same classifications across different servers and databases, but you can export and import any existing ones.

Have a look at the Policy definition file.

Apply the Data Classifications
Now, apply the classifications. Azure will suggest applying classifications based on the name of the columns and your information types.

After that, you can create new classifications by selecting the option highlighted below.

Azure is going to give you recommendations that you can easily apply.


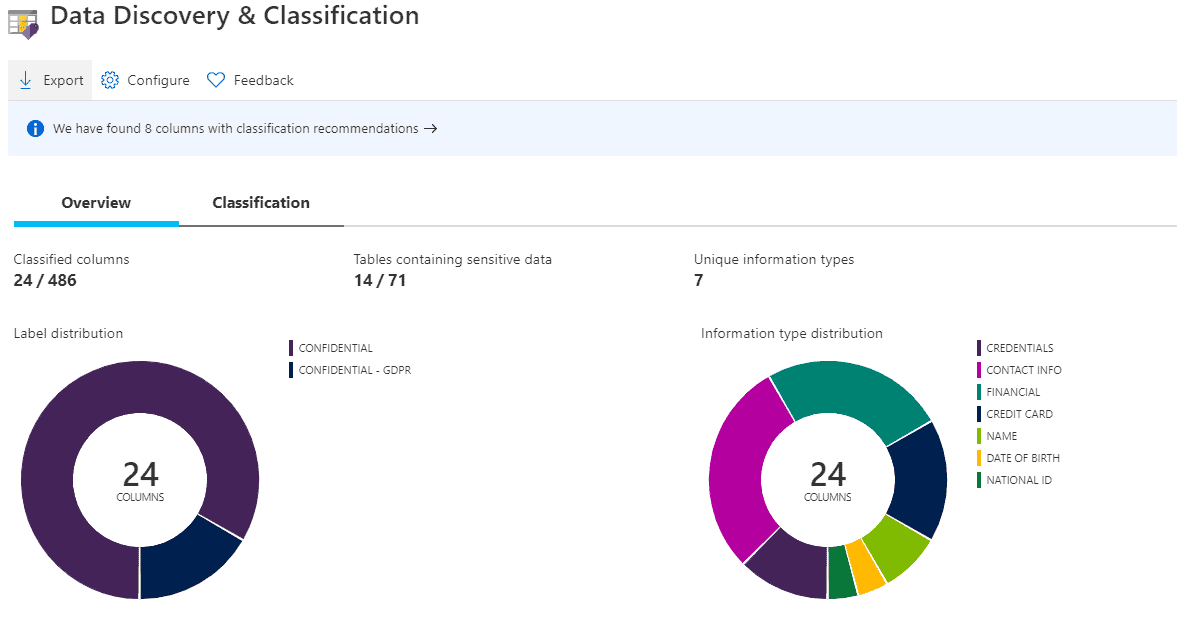
Once you have saved the classifications, find the summary in the Overview section.

Summary
Today we’ve looked at how to easily enable data classification without writing a single line of code using the Azure portal. This brings new security features allows you to extend the governance of your data assets.
Final Thoughts
Security concerns about the correct usage of data have been increasing significantly during the past few years. We have seen many data breaches in small, medium and large organizations. The technology is already in place, we just need to start using it. Enabling these features is certainly necessary.
What’s next?
In upcoming blog posts, I will explain how to query audit data to identify how data classification is being applied.
Please follow Tech Talk Corner on Twitter for blog updates, virtual presentations, and more!
As always, please leave any comments or questions below.
Check out my other posts
Cost Optimization with Lifecycle Management in Storage Accounts