


Recently I had to integrate SharePoint lists with Azure Data Factory and Azure Synapse Analytics multiple times. This is because some users were storing and maintaining reference data in these SharePoint lists.
In this post, you’ll learn how to easily connect to your SharePoint lists from Azure Data Factory or Synapse Analytics. This blog post is intended for SharePoint online lists, and they are supported as a source, not as a sink/destination in your copy activities.
Table of Contents
Why should I store information in SharePoint lists for my Data Analytics solutions?
To begin, while it doesn’t sound like the best approach, SharePoint lists offer great flexibility when storing reference data or internal lists for your data analytics solutions.
The main reasons to use this approach and not build a Master Data Management (MDM) system or reference data repository are:
- They are better than excel spreadsheets
- You will only maintain a few reference data assets that need to access or be maintained by data stewards, which is easier than building a new system
- It comes with version history
- Integrated with approval processes and alerts as well as Power Automate
- Includes meta columns like Created Date and Modified Date
- It is part of every Office365 license
Examples SharePoint lists:
- SharePoint list with the database configuration for resuming, pausing, scaling up/out and down automatically
- SharePoint list with the list of Power BI reports that you want to refresh as part of your data movement
- SharePoint list with reference data that is maintained across different data stewards or business stakeholders
Register App in Azure to be Used in Azure Data Factory and Synapse Analytics
First, go to App registrations (in Azure Active Directory) and select the option to register a new app.
 and select the option to register a new app.")
Fill out the information for your application and register it. For Redirect URI, you can use http://localhost:5000/signin-oidc

Copy the App ID, Directory ID (you are going to need it)

Create a new client secret.

Add a name and date when it will expire (this is something to write down and remember, the maximum length is 2 years).

Copy the value (you are going to need it for your Azure Data Factory or Synapse Analytics SharePoint linked service).
.")
Grant App Access to Your SharePoint Site
Next, after you’ve created the application that will be used to access your SharePoint site from Azure Data Factory or Synapse Analytics, you need to grant read access.
Navigate to the following URL and replace [your site URL] with the name of your SharePoint site.
https://[your_site_url]/_layouts/15/appinv.aspx Fill out the information as described in the following picture.

Permissions XML:
<AppPermissionRequests AllowAppOnlyPolicy="true">

    <AppPermissionRequest Scope="http://sharepoint/content/sitecollection/web" Right="Read"/>

</AppPermissionRequests>
Then, you need to trust the application to access your SharePoint site.

Now that you’ve created the application in Azure and granted it access to your SharePoint site, create the connector for SharePoint lists from your Azure Data Factory or Synapse Analytics.
Create Azure Data Factory or Azure Synapse Analytics Linked Service
In Azure Data Factory or Azure Synapse Analytics, create a new linked service for SharePoint lists.
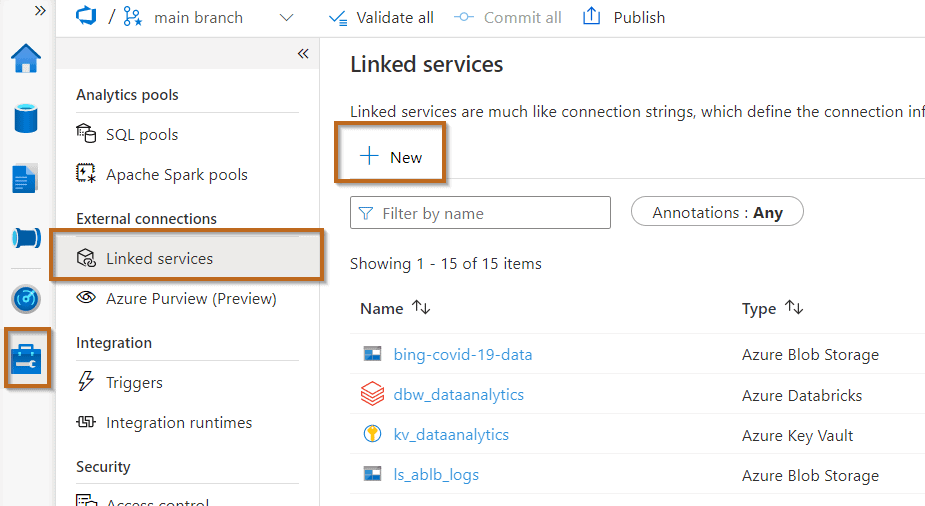
Select the SharePoint Online List connector.

Configure your SharePoint Online list linked service with the following information:
- Linked Service name
- Description
- Integration Runtime
- Site URL: your SharePoint site URL
- Tenant: the Directory ID previously copied. It might populate it by default.
- Service Principal ID: include your application ID
- Service principal key: your secret value. I suggest storing it in Azure Key Vault.

Don’t forget to test the connectivity!
Create SharePoint List Dataset
Now, create a new dataset in Azure Data Factory or Synapse Analytics by selecting the SharePoint online list dataset.

Select the linked service that you created before and the list name.

You can now preview the data. You’ll see all the meta columns (modified date, created date and many more useful columns for your data movement).
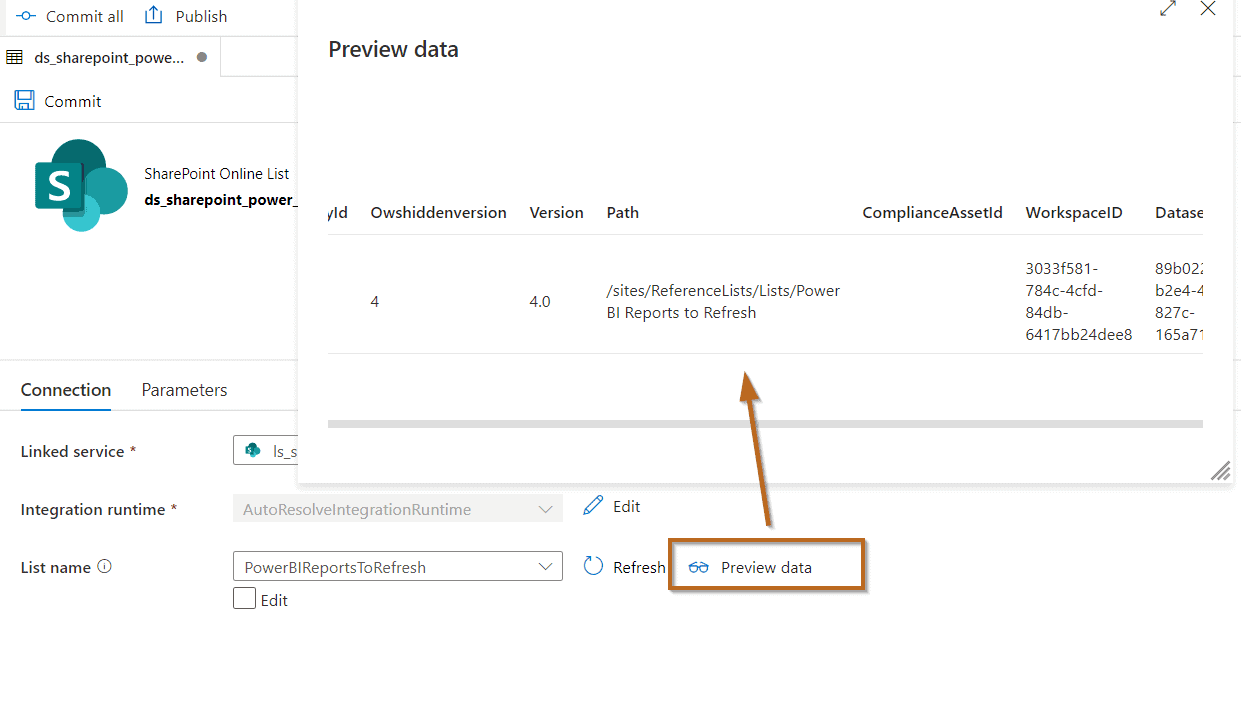
You are ready to start using your dataset in your pipelines to copy information!
Summary
In summary, you’ve learned how easy it is to start taking advantage of SharePoint lists and connect to them from Azure Synapse Analytics or Azure Data Factory.
I have also shared a few scenarios that you can take into account when using SharePoint lists.
What’s Next?
In upcoming blog posts, we’ll continue to explore some of the features within Azure Data Services.
Please follow Tech Talk Corner on Twitter for blog updates, virtual presentations, and more!
If you have any questions, please leave a comment below!

1 Response
Seun
04 . 01 . 2023Hi David, thank you for this wonderful explanations. Can you do another post that show the copy and sink activities or point to a similar one you did. Thanks